How to Dye a Disc Golf Disc: Shaving Cream and Spin Dye Methods

Quick Comparison
| Product | Best For | Price |
|---|---|---|
The go-to dye for disc golfers who want bright, saturated color on plastic | Check Price | |
Disc golfers who want a pre-mixed liquid dye that is easy to measure and pour | Check Price | |
Spin dyers who want controlled, even dye flow instead of runny splatter | Check Price | |
Disc dyers who want to cut precise, detailed, repeatable stencils for logos and layered art | Check Price | |
Beginners who want practice discs to dye while learning the methods | Check Price |


The go-to dye for disc golfers who want bright, saturated color on plastic
Check Price on AmazonDisc golfers who want a pre-mixed liquid dye that is easy to measure and pour
Check Price on AmazonSpin dyers who want controlled, even dye flow instead of runny splatter
Check Price on AmazonDisc dyers who want to cut precise, detailed, repeatable stencils for logos and layered art
Check Price on AmazonBeginners who want practice discs to dye while learning the methods
Check Price on AmazonIf you have ever wanted a disc that nobody else on the course has, dyeing is the cheapest, fastest way to get there. For the price of a bottle of dye and an afternoon, you can turn a plain white disc into a swirl of color, a sharp stencil design, or your own logo. And here is the part that surprises people: learning how to dye a disc golf disc does not break any rules. Dye only colors the plastic. It does not change the weight, the rim shape, the flex, or anything that affects flight, so a dyed disc is fully PDGA-legal for tournament play.
The verdict up front: dyeing is one of the best low-cost ways to personalize your bag, and the two beginner-friendly methods - shaving cream dye and spin dye - require almost no special equipment. You will get the best results on gummy premium plastics, white blanks, and the right kind of dye. Most failed dye jobs come down to using the wrong dye (regular cotton dye will barely tint disc plastic) or the wrong disc.
This guide walks through what discs and dyes actually work, both core methods step by step, how to add stencils and clean designs, the mistakes that ruin a dye job, and the rules around keeping your dyed disc tournament-legal.
What Discs and Dyes Work Best for Dyeing
Before you touch any dye, two choices determine whether your disc comes out vivid or muddy: the disc itself and the dye chemistry.
Pick a gummy premium plastic in white
Disc plastic is not all the same. The premium, slightly grippy "gummy" blends absorb dye far better than hard, slick, baseline plastics. The plastics that take dye cleanly and brightly:
- Innova Star - the classic dyer's plastic, soft and very receptive
- Discmania S-Line - essentially the same family as Star, dyes beautifully
- Latitude 64 Opto - takes color evenly with rich saturation
- Discraft ESP - gummy and grippy, dyes well and gives a slightly marbled depth
- Prodigy 400 - soft and absorbent, a reliable choice
Avoid hard, glossy plastics like Innova Champion, Discraft Z, or Latitude 64 Gold for your first attempts. They are sealed and slick, so dye sits on top instead of soaking in, and the color comes out faint.
Color matters too. Start with a white or light-colored blank disc. White shows dye truest, so a red dye looks red. Dye a yellow disc red and you get orange. Dye a blue disc red and you get a murky purple-brown. Light gray and cream work in a pinch, but white is the canvas you want while you are learning.
A blank-top disc (no factory stamp) gives you the most room to work, though you can dye a stamped disc and just dye around or over the stamp.
Use a polyester or synthetic dye, not cotton dye
This is the single most important supply decision. Disc golf discs are made of plastic, and standard all-purpose dyes (the kind made for cotton t-shirts) are designed to bond with natural fibers. They will not meaningfully color plastic. You need a disperse dye built for polyester and synthetics.
Two dyes dominate the disc-dyeing world: Jacquard iDye Poly and Rit DyeMore for Synthetics. Both work with heat, both are widely available, and both are what experienced disc dyers reach for.
Jacquard iDye Poly
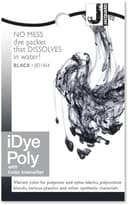
Jacquard iDye Poly Polyester Dye
The go-to dye for disc golfers who want bright, saturated color on plastic
Pros
- Purpose-built for plastics and synthetics, including discs
- Mess-free dissolvable packet
- Bright, saturated colors that hold up
- Cheap enough to stock several colors
Cons
- Requires heat to activate, so no quick cold-dye shortcuts
- Color range per packet is one shade only
- Can stain pots and surfaces if you are careless
iDye Poly is the most popular dye in the disc-dyeing community for good reason. It is specifically formulated to color synthetics, and Jacquard openly lists frisbees and discs among the things it dyes well. The dye comes in a dissolvable packet, so there is no loose powder to spill - you drop the whole packet into hot water and it disperses.
The trade-off is that iDye Poly needs heat to activate. The dye bonds with plastic at high temperature, which is why both the shaving cream method (using very hot water) and the spin dye method (using a heated dye bath) rely on getting the dye hot. You cannot just mix it cold and expect deep color.
A single packet goes a long way. One packet makes enough dye for several discs, and it comes in a wide color range, so you can build a small palette cheaply. Buy two or three colors and you have everything you need to start.
Rit DyeMore for Synthetics
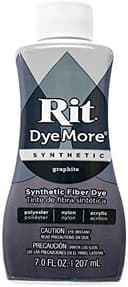
Rit DyeMore Synthetic Fiber Liquid Dye
Disc golfers who want a pre-mixed liquid dye that is easy to measure and pour
Pros
- Pre-mixed liquid is easy to measure and pour
- Simple to blend custom colors by combining bottles
- Widely stocked at craft stores
- Reliable, consistent results on plastic
Cons
- Less concentrated than iDye Poly packets
- Liquid bottles cost more per dye job for dark shades
- Still requires sustained high heat
Rit DyeMore is the other mainstream choice, and the practical difference from iDye Poly is the format. DyeMore comes as a pre-mixed liquid in a squeeze bottle, which makes it easy to pour exact amounts and to blend custom colors by mixing bottles. If you like the idea of dialing in a specific teal or coral by combining shades, the liquid format makes that simpler.
Like iDye Poly, DyeMore is a disperse dye that needs sustained high heat to bond with plastic. Rit specifically markets it for synthetics and lists plastics among the materials it dyes. It is sold in a broad color range and is stocked at most craft stores, so it is easy to find in a pinch.
The downside is cost per use. The liquid is less concentrated than an iDye Poly packet, so for deep, dark colors you may use more product. For most disc projects either dye is fine, and many dyers keep both on the shelf.
If you are still deciding which discs to buy and dye, our guide to Innova plastic types explained breaks down exactly which blends are gummy and dye-friendly versus hard and dye-resistant.
Method 1: Shaving Cream Dye
The shaving cream method is the easiest entry point and produces those colorful marbled, swirled, tie-dye looks. You float dye on a bed of shaving cream, drag it into a pattern, and press the disc into it. It is forgiving, it is fun, and it works well for a first attempt.
You will need: a white blank disc, foam shaving cream (the cheap white stuff, not gel), synthetic dye mixed into a concentrate, a flat tray or baking sheet, a toothpick or skewer, gloves, and paper towels.
Step 1: Mix your dye concentrate. Dissolve a small amount of iDye Poly or Rit DyeMore in a cup of very hot water to make a strong, concentrated liquid. You want it dark and intense, since the shaving cream will dilute it.
Step 2: Spread the shaving cream. Cover the bottom of your tray with a thick, even layer of foam shaving cream, at least an inch deep. Smooth the top flat with a straightedge or piece of cardboard.
Step 3: Drop and swirl the dye. Drip your dye concentrate onto the surface of the shaving cream in dots, lines, or random splatters. Use two or three colors for depth. Drag a toothpick through the dye to swirl it into the marbled pattern you want. Do not overmix or the colors turn brown.
Step 4: Press the disc. Lay your disc face-down onto the shaving cream so the top surface makes full contact. Press gently and evenly so every part touches the dye. You can leave it 5 to 30 minutes; longer contact with hot, strong dye gives deeper color.
Step 5: Scrape and reveal. Lift the disc and scrape the shaving cream off with a piece of cardboard or a paper towel. Wipe until the foam is gone and the design appears. Rinse the disc under water and dry it.
The shaving cream method gives a softer, more organic result than the spin method. It is the right first project because mistakes just look like different swirls.
Method 2: Spin Dye
Spin dyeing produces sharp, geometric, sunburst-style patterns by rotating the disc while dye flows onto it. It takes a little more setup but the results look polished and intentional.
You will need: a white blank disc, synthetic dye mixed hot, a way to spin the disc (a lazy Susan, a record player, or a dedicated disc spinner), squeeze bottles or droppers, a pouring medium or thickener, gloves, and a surface you do not mind staining.
A pouring medium is the upgrade that takes spin dye from messy to clean. Mixed into your dye, it thickens the liquid so it flows in controlled rings and lines instead of running everywhere.
U.S. Art Supply Floetrol Pouring Medium
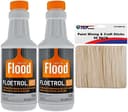
U.S. Art Supply Floetrol Paint Additive Pouring Medium
Spin dyers who want controlled, even dye flow instead of runny splatter
Pros
- Thickens dye for controlled, repeatable spin patterns
- Inexpensive and a single bottle lasts a long time
- Includes mixing sticks for prepping dye
- Works with both iDye Poly and Rit DyeMore
Cons
- Not needed at all for the shaving cream method
- Adds a mixing step to your prep
- Too much makes dye gloopy and hard to pour
Floetrol is a paint conditioner borrowed from the acrylic pouring world, and disc dyers use it to give dye body. A few drops mixed into your hot dye concentrate thickens the liquid just enough that when you pour it onto a spinning disc, it lays down in clean rings and feathered lines rather than sheeting off the edge.
For spin dyeing specifically, that control is everything. The whole appeal of the spin method is crisp concentric patterns, and a watery dye fights you. Floetrol gives you the consistency to actually draw with the dye while the disc turns under it.
It is also genuinely cheap and a bottle lasts through dozens of discs. If you only ever dye with the shaving cream method you can skip it, but for spin dyeing it is close to essential.
Step 1: Set up your spinner. Mount or place the disc on your spinning surface, top-side up, centered as closely as you can. An off-center disc gives a lopsided pattern.
Step 2: Mix thickened dye. Make your hot dye concentrate, then stir in a small amount of Floetrol until the dye has a light syrup consistency. Mix a separate cup for each color.
Step 3: Spin and pour. Start the disc spinning slowly. Use a squeeze bottle or dropper to apply dye near the center, near the rim, or anywhere you want a ring. The spin pulls the dye into concentric circles. Touch a skewer into a ring and drag outward to create sunburst spikes.
Step 4: Let it sit. Stop the spin and let the disc rest flat so the hot dye keeps working into the plastic. Give it 15 to 45 minutes depending on how deep you want the color.
Step 5: Rinse and dry. Rinse the disc under running water until the water runs clear, then dry it. The pattern is now permanent in the plastic.
Spin dye rewards practice. Your first one may look uneven; by your third you will be making patterns that look store-bought.
Stencils and Designs: Going Beyond Swirls
Once you are comfortable with color, the next step is adding sharp, intentional designs - logos, names, shapes, your own art. The key is a stencil that masks part of the disc so dye only reaches the areas you want.
The beginner approach uses contact paper or adhesive vinyl cut by hand. You stick a sheet of vinyl or shelf contact paper onto the clean disc, draw or trace your design, and cut it out carefully with a craft knife. Whatever vinyl stays on the disc blocks dye; whatever you peel away gets colored. Hand-cutting works fine for simple shapes and bold lettering.
For anything detailed - fine line art, intricate logos, layered multi-color designs - hand-cutting becomes the limiting factor. That is where a desktop cutting machine changes everything. A machine like the Cricut Explore 3 or the Silhouette Cameo cuts adhesive vinyl into precise stencils from a digital design in seconds, with detail no craft knife can match.
Silhouette Cameo 5
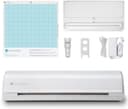
Silhouette Cameo 5 12-inch Vinyl Cutting Machine
Disc dyers who want to cut precise, detailed, repeatable stencils for logos and layered art
Pros
- Cuts intricate, detailed stencils no knife can match
- Repeatable identical stencils for matched disc sets
- Enables layered multi-color stencil dyeing
- Doubles as a general-purpose craft tool
Cons
- The most expensive item needed for disc dyeing
- Has a software learning curve
- Overkill if you only want simple swirl dyes
The Silhouette Cameo 5 is the upgrade path for anyone serious about stencil dyeing. You design or import artwork in the included Silhouette Studio software, and the machine cuts that design into adhesive vinyl with precision a craft knife cannot touch. Fine text, thin lines, intricate logos, and clean curves all become easy.
For disc dyeing this unlocks two big things. First, repeatability: if you want to dye a matching set of discs with the same logo, the machine cuts identical stencils every time. Second, layered designs: you can cut multiple masks and dye in stages to build multi-color art, the kind of work that makes a disc look professionally produced.
It is the high-ticket item on this list, and you do not need it to start dyeing. But if you find yourself dyeing often, want to dye discs for friends, or are tempted to sell custom discs, a cutting machine pays for itself in capability. The Cameo 5 and the Cricut Explore 3 are the two mainstream options; both cut vinyl stencils well, so pick the ecosystem and software you prefer.
If you do go the stencil route, plan your design first, weed it carefully (remove the cut pieces you want dyed), and burnish the vinyl down hard so dye cannot creep under the edges. A stencil that lifts at the corners bleeds, and bleed is the most common stencil-dye disappointment.
A custom-dyed disc with someone's name or favorite design also makes a standout present - we cover more ideas like this in our disc golf gifts guide.
You Need a Disc to Dye: Start With a Blank Set
You cannot dye a disc you do not own, and beginning with a multi-pack of blank-top discs gives you cheap practice material across driver, midrange, and putter molds.
Innova DX 3-Disc Set with Blank Top
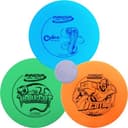
Innova Disc Golf DX 3 Disc Set - Driver, Midrange, Putter
Beginners who want practice discs to dye while learning the methods
Pros
- Affordable practice discs for learning to dye
- Covers driver, midrange, and putter molds
- Blank tops give a clean canvas
- Usable on the course even after experimental dye jobs
Cons
- DX plastic does not dye as brightly as premium plastics
- Colors and exact molds may vary
- Not the showcase plastic for your best designs
A 3-disc set gives you something to practice on without committing premium-plastic money to your first attempts. DX plastic is a baseline plastic, so it will not dye as vividly as Star or ESP, but for learning the mechanics of swirling, spinning, and stenciling, an affordable set is exactly what you want before you "graduate" to dyeing nicer discs.
Treat your first few dye jobs as experiments. Try the shaving cream method on one, spin dye another, cut a simple stencil for the third. Once your technique is solid on cheap discs, move up to gummy premium plastics in white for your showcase pieces.
If you are also still building out a playable bag, our roundup of the best disc golf discs for beginners covers which molds belong in a starter lineup, several of which come in dye-friendly plastics.
Common Mistakes to Avoid
A few errors account for most disappointing dye jobs. Avoid these and your results jump immediately.
Using the wrong dye. Regular all-purpose cotton dye will barely tint plastic. You must use a disperse dye made for synthetics like iDye Poly or Rit DyeMore. This is the number one reason a dye job comes out faint.
Skipping the heat. Disperse dyes bond to plastic with heat. Cold dye, even synthetic dye, gives weak color. Use very hot water in your concentrate and let the disc sit while the dye is still warm.
Dyeing a dark or stamped disc and expecting bright color. White shows dye truest. A colored base disc shifts every color you apply. Start with white blanks.
Not cleaning the disc first. Oils, dirt, and residue block dye. Wash the disc with dish soap and dry it completely before you start.
Letting stencils lift. If vinyl or contact paper edges peel up, dye creeps under and your crisp lines turn fuzzy. Burnish stencils down hard and check every edge.
Overmixing shaving cream colors. Drag the toothpick a few times, not a dozen. Overworked dye turns muddy brown instead of staying vivid.
Rushing the rinse. Rinse until the water runs completely clear. Leftover surface dye can rub off onto your hand or bag later.
Is a Dyed Disc Legal? Yes, With One Caveat
Here is the rules question every dyer eventually asks: can you throw a dyed disc in a sanctioned tournament? The answer is yes. Dye only colors the plastic. It does not change the disc's weight, diameter, rim configuration, flexibility, or any physical property that affects flight. A dyed disc flies exactly like an undyed one of the same mold and weight, so it remains PDGA-approved and tournament-legal.
The one caveat is what you do not do. Dyeing is fine. Sanding, grinding, melting, reshaping, or otherwise physically altering a disc is not. Any modification that changes flight characteristics takes a disc out of PDGA-approved status. So decorate freely, but do not take sandpaper to the rim to make it more or less stable. Keep your changes to the surface color and your disc stays legal.
One practical note: heavy dyeing does not weaken a disc, but be reasonable with heat. The hot water and heated dye baths used in these methods are well within what disc plastic tolerates. You are coloring the disc, not cooking it.
Frequently Asked Questions
Can you use regular Rit dye to dye a disc golf disc?
No. Standard all-purpose Rit dye is made for natural fibers like cotton and will barely color plastic. You need Rit DyeMore for Synthetics or Jacquard iDye Poly, both of which are disperse dyes formulated to bond with polyester and plastics.
Is dyeing a disc golf disc PDGA-legal?
Yes. Dye only changes the color of the plastic, not the weight, shape, or flex, so it does not affect flight characteristics. A dyed disc stays PDGA-approved. Physically altering the disc by sanding or reshaping it is what makes a disc illegal, not dyeing it.
What is the best plastic to dye?
Gummy premium plastics absorb dye best: Innova Star, Discmania S-Line, Latitude 64 Opto, Discraft ESP, and Prodigy 400. Hard, glossy plastics like Champion and Z plastic resist dye and produce faint color.
Does dyeing a disc affect how it flies?
No. The dye soaks into the surface of the plastic and adds no measurable weight or shape change. A dyed disc flies identically to the same disc undyed.
What color disc should I start with?
Start with a white or light-colored blank. White shows dye colors truest. Dyeing over a colored disc shifts every color you apply, so a red dye on a yellow disc looks orange.
Do I need a cutting machine to dye discs?
No. The shaving cream and spin dye methods need no machine at all, and you can hand-cut simple stencils from contact paper. A machine like the Silhouette Cameo or Cricut Explore 3 is an upgrade for cutting detailed, repeatable stencils once you want sharper designs.
How long does the dye need to sit on the disc?
It depends on the method and how deep you want the color. Shaving cream contact runs roughly 5 to 30 minutes; spin dye sits 15 to 45 minutes. Hotter, stronger dye and longer contact produce deeper color.
Final Thoughts
Learning how to dye a disc golf disc is one of the most satisfying cheap projects in the sport. For the cost of a Jacquard iDye Poly packet and an afternoon, you can turn a plain white disc into something nobody else throws, and it stays fully tournament-legal because dye changes color, not flight.
Start simple. Grab an Innova DX blank set to practice on, try the shaving cream method first, then move to spin dye with a little Floetrol for cleaner patterns. When you are ready for sharp logo work, a Silhouette Cameo 5 opens the door to detailed stencils and matched sets. Whichever dye you reach for - iDye Poly or Rit DyeMore - the rules stay the same: white gummy plastic, the right synthetic dye, and heat. Get those three right and your first disc will come out better than you expect.
Affiliate Disclosure
This post contains affiliate links. As an Amazon Associate, Pine Tree Disc earns from qualifying purchases at no additional cost to you. Learn more
Isaac "Steaks" Salisbury is the Maine native who founded Pine Tree Disc Golf. He's been throwing plastic through Maine's forests and fairways for years and started Pine Tree to build disc golf gear and content that players can wear and trust on and off the course.
Learn more about Pine Tree Disc →