Disc Golf Flight Chart: How to Read It and Pick the Right Disc

Quick Comparison
| Product | Best For | Price |
|---|---|---|
Beginners learning fairway drives and anyone who needs a reliable turnover disc | Check Price | |
Intermediate players who want easy distance and roller lines | Check Price | |
Dead-straight approach shots and the most versatile midrange slot in any bag | Check Price | |
The straightest midrange you can throw - pure point and shoot | Check Price | |
First distance driver for intermediate players who want controlled distance with a full flight path | Check Price | |
Headwind drives, flex shots around corners, and utility skip shots | Check Price | |
Overstable approach shots, forehand flicks inside 200 feet, and windy putting | Check Price | |
Advanced players who need maximum distance with a reliable fade finish | Check Price |
Beginners learning fairway drives and anyone who needs a reliable turnover disc
Check Price on AmazonIntermediate players who want easy distance and roller lines
Check Price on AmazonDead-straight approach shots and the most versatile midrange slot in any bag
Check Price on AmazonFirst distance driver for intermediate players who want controlled distance with a full flight path
Check Price on AmazonHeadwind drives, flex shots around corners, and utility skip shots
Check Price on AmazonOverstable approach shots, forehand flicks inside 200 feet, and windy putting
Check Price on AmazonAdvanced players who need maximum distance with a reliable fade finish
Check Price on AmazonEvery disc golf disc comes stamped with four numbers - but those numbers only tell part of the story. A disc golf flight chart takes those raw numbers and plots them visually, showing you exactly how a disc will travel from release to landing. Once you learn to read one, choosing the right disc for any shot stops being guesswork and starts being strategy.
Flight charts are the single most useful tool for building a balanced bag. They let you compare discs across manufacturers, spot gaps in your lineup, and predict how a disc will behave before you ever throw it. Whether you're eyeing the Marshall Street Flight Guide or scrolling through InfiniteDiscs, these charts all work on the same underlying logic.
In this guide, you'll learn what each flight number actually controls, how to read the visual flight path on a chart, and how to use that knowledge to pick discs that match your arm speed and playing style. We'll also recommend specific discs at every point on the stability spectrum so you can fill any gaps in your bag.
Flight Numbers Cheat Sheet
If you only memorize one thing from this guide, make it this table. Every disc you pick up has these four numbers in this order, and each one tells you something specific about how the disc will fly.
Number: Speed | Range: 1 to 14 | What It Means: Power required to hit the disc's intended flight | Quick Read: Higher number = needs more arm speed
Number: Glide | Range: 1 to 7 | What It Means: How long the disc stays in the air | Quick Read: Higher number = floats longer, more distance
Number: Turn | Range: -5 to +1 | What It Means: High-speed behavior (early flight) | Quick Read: Negative = turns right (RHBH); 0 or positive = holds line
Number: Fade | Range: 0 to 5 | What It Means: Low-speed behavior (end of flight) | Quick Read: Higher number = harder left finish (RHBH)
A disc rated 9/5/-2/2 is a speed 9 driver with high glide, moderate turn, and moderate fade - a forgiving, distance-friendly fairway driver. A disc rated 4/3/0/3 is a slow, low-glide approach disc with a guaranteed left finish - a Zone-style overstable putter. Once you can read this language, the chart becomes a map.
What Is a Disc Golf Flight Chart?
A disc golf flight chart is a visual representation of how discs fly based on their flight ratings. Instead of staring at raw numbers and guessing what they mean, a flight chart plots discs on a grid so you can instantly see how they compare.
Most flight charts organize discs along two axes. The vertical axis sorts discs by speed - putters at the bottom, distance drivers at the top. The horizontal axis sorts by stability - overstable discs on one side, understable discs on the other. Some charts also draw the actual flight path of each disc, showing the curve from release to landing.
Innova pioneered the four-number flight rating system in the early 2000s, and it's become the universal language of disc golf. Every major manufacturer - Discraft, Latitude 64, MVP, Dynamic Discs - uses the same four categories, though there are subtle differences in how each brand calibrates their numbers. A Discraft disc rated at speed 9 might fly slightly differently than an Innova disc rated at speed 9, which is exactly why visual flight charts are so valuable. They normalize the comparison.
Think of the flight chart as a map of your bag. When you know where each of your discs sits on that map, you can identify which shots you're covered for and which ones you're missing.
The Four Flight Numbers Explained
Before you can read a flight chart, you need to understand the four numbers that generate it. Every disc is rated with Speed, Glide, Turn, and Fade - always in that order. A disc listed as 9/4/-2/2 has a speed of 9, glide of 4, turn of -2, and fade of 2.
These numbers describe how the disc is designed to fly when thrown flat with adequate arm speed by a right-hand backhand (RHBH) thrower. That qualifier matters - we'll talk about why later.
Speed (1-14)
Speed is the disc's power requirement, not a measure of how fast it will go when you throw it. A speed 12 driver needs significantly more arm speed to achieve its intended flight path than a speed 5 midrange.
Here's the misconception that traps every new player: higher speed does not mean more distance. If you can't generate enough velocity to "activate" a high-speed disc, it won't glide or turn the way the chart predicts. It will just fade out early and crash. A speed 6 fairway driver thrown at full potential will almost always outperform a speed 12 driver thrown with insufficient arm speed.
Speed ranges by disc type:
- Putters: 1-3
- Midranges: 4-6
- Fairway drivers: 6-9
- Distance drivers: 10-14
On a flight chart, speed determines the vertical position. Higher speed discs sit near the top, lower speed discs near the bottom.
Glide (1-7)
Glide measures a disc's ability to maintain loft during flight. Higher glide means the disc wants to stay in the air longer, which generally translates to more distance - especially for players with slower arm speeds.
A glide of 6 is exceptionally floaty. The disc carries and carries, which is great for distance but can be unpredictable in wind. A glide of 2 is a brick that cuts through wind reliably but won't hang in the air for long. Most discs fall between 3 and 6.
Glide doesn't usually show up directly on flight charts, but it affects the overall shape of the plotted flight path. High-glide discs have longer, more gradual arcs. Low-glide discs have shorter, more abrupt paths.
Turn (-5 to +1)
Turn describes what the disc does during the high-speed phase of flight - the first half of its journey. For a RHBH throw, negative turn values mean the disc moves to the right during this phase.
- -5 to -3: Very understable. The disc turns hard right early in flight.
- -2 to -1: Moderately understable. The disc drifts right before fading back.
- 0: Neutral. The disc resists turning and flies relatively straight.
- +1: Overstable at high speed. The disc fights any tendency to turn right.
Turn is the primary factor that determines a disc's horizontal position on a flight chart. More negative turn pushes the disc toward the understable side. Zero or positive turn places it on the overstable side.
Fade (0-5)
Fade is what the disc does at the end of its flight as it slows down. Every disc eventually fades left (for RHBH) as it loses speed - the question is how aggressively.
- 0: Almost no fade. The disc glides down on a straight line.
- 1-2: Moderate fade. A gentle hook left at the end.
- 3-4: Strong fade. A hard, reliable left finish.
- 5: Extreme fade. The disc dumps hard left like it hit a wall.
Fade is especially important for approach shots and utility discs. A disc with fade 0 is great for dead-straight tunnel shots. A disc with fade 4 is a weapon for hooking around obstacles and fighting headwinds.
On a flight chart, fade works together with turn to determine overall stability. A disc with turn -3 and fade 1 will have a very different plotted path than a disc with turn 0 and fade 4, even though both have interesting curves.
How to Read a Disc Golf Flight Chart
Now that you understand the four numbers, here's how to actually use a flight chart. We'll walk through the most common chart format - the overhead view, which shows flight paths from above as if you were watching a drone camera.
Step 1: Find your disc on the chart. Most charts let you search by name or filter by disc type. The disc will be plotted on a grid based on its speed and stability.
Step 2: Read the horizontal position. Discs on the left side of the chart are overstable - they resist turning and finish hard left. Discs on the right side are understable - they turn right early and may not come back. Discs in the middle are neutral or stable - they fly relatively straight with a gentle fade.
Step 3: Read the vertical position. Discs near the top are high-speed drivers. Discs near the bottom are putters and midranges. The vertical position tells you the power requirement and typical use case.
Step 4: Trace the flight path. If the chart draws flight lines, follow the path from bottom to top (release to landing, viewed from above). An understable disc's path will curve right then fade back left, creating an S-shape. An overstable disc's path will hold straight or push left the entire time. A neutral disc will fly straight with a gentle left finish.
Step 5: Compare multiple discs. The real power of a flight chart is comparison. Overlay two or three discs you're considering and see how their paths differ. This is how you identify whether a new disc actually fills a gap in your bag or duplicates something you already carry.
Flight Chart Examples: Comparing Popular Discs
Since we can't embed an interactive chart here, let's walk through three common flight shapes from a RHBH perspective. Imagine you're standing on the tee pad, throwing straight ahead. The target is directly in front of you.
Understable Flight Path
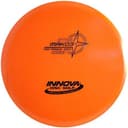
Example: Innova Leopard (6/5/-2/1)
Off the release, the Leopard pushes slightly right thanks to its -2 turn rating. If thrown flat with decent speed, it holds that rightward drift for about two-thirds of the flight. Then, as it slows down, the gentle fade of 1 pulls it back toward center-left. The resulting flight path is an S-curve - right, then back left.
This S-shape is what makes understable discs so useful. Thrown flat, they give you natural right-to-left movement. Thrown on a hyzer (tilted left), they flip up to flat and fly straight - the famous "hyzer flip" line. For newer players, understable discs often provide the most distance because they actually use the full flight path instead of fading out early.
Stable/Neutral Flight Path
Example: Discraft Buzzz (5/4/-1/1)
The Buzzz releases and holds almost dead straight. That -1 turn barely nudges it right - just enough to keep it from fading early. The disc cruises on a flat, straight line for most of its flight. As it slows, the fade of 1 gives a predictable, gentle finish to the left. The flight path looks like a very slight left-leaning line - almost straight with a soft hook at the end.
Neutral discs are the backbone of any bag because they go where you aim them. Point a Buzzz at the basket and it flies at the basket. Point it right and it finishes right. Point it left and it finishes left. On a flight chart, these discs sit right in the middle of the horizontal axis.
Overstable Flight Path
Example: Innova Firebird (9/3/0/4)
The Firebird launches straight or even slightly left from the moment it leaves your hand. With 0 turn, there's no rightward movement at all during high-speed flight. It holds a flat or slightly left-tracking line through the first portion of flight. Then the fade of 4 kicks in and the disc hooks hard left. The flight path looks like a straight line that bends sharply left at the end - like a hockey stick.
Overstable discs are utility tools. You throw a Firebird when you need to go around a corner, when you're throwing into a headwind (which makes discs act more understable), or when you need a reliable skip on landing. On a flight chart, these discs sit firmly on the left side.
Using Flight Charts to Build Your Bag
A well-built bag covers the full spectrum of the flight chart - understable, neutral, and overstable options at multiple speed levels. Here's how to think about bag building at different skill levels.
What Beginners Need
If you're new to disc golf, focus on the bottom-right quadrant of the flight chart: low speed, understable to neutral. You want:
- One putter (speed 2-3) for putting and short approaches
- One neutral midrange (speed 4-5) for straight shots inside 250 feet
- One understable fairway driver (speed 6-7) for max distance shots
That's it. Three discs. Beginners don't have the arm speed to utilize high-speed drivers or overstable discs. An understable speed 7 will give you more real-world distance than an overstable speed 12 at this stage. The flight chart confirms this - the understable fairway will actually achieve its full S-curve, while the high-speed driver will just fade out.
What Intermediate Players Need
Once you're consistently throwing 250-300 feet, you can start expanding across the flight chart. Add:
- An overstable approach disc (speed 3-4) for windy days and reliable fades
- A stable fairway driver (speed 7-9) for controlled distance shots
- An understable distance driver (speed 9-10) for max distance
- An overstable fairway driver (speed 7-9) for headwinds and flex shots
Now you have options at multiple points on the stability axis. The flight chart shows you why this matters - you can visualize the different lines each disc gives you and pick the right one for each hole.
What Advanced Players Need
Advanced players typically carry 15-20 discs that carpet the flight chart from corner to corner. The key additions are:
- Multiple molds at similar speeds but different stabilities - for example, an understable, neutral, and overstable midrange
- Premium plastic versions of key discs - these fly slightly more overstable than base plastics, giving you micro-adjustments on the chart
- Beat-in duplicates - a new disc and a seasoned version of the same mold occupy slightly different spots on the chart because wear makes discs more understable over time
At this level, the flight chart isn't just a shopping tool - it's a course management strategy. You look at a hole, visualize the line you need, then find the disc on your mental flight chart that matches that line.
Best Discs by Flight Chart Position
Here are proven picks at each stability zone. These are discs that fly true to their numbers and deserve a spot in most bags.
Best Understable Discs
These discs occupy the right side of the flight chart. They turn right early and offer easy distance, roller potential, and hyzer-flip lines.
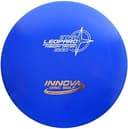
Innova Leopard
Innova Star Leopard
Beginners learning fairway drives and anyone who needs a reliable turnover disc
Pros
- Excellent hyzer-flip disc for developing players
- High glide (5) maximizes distance for slower arm speeds
- Available in every Innova plastic type
- Predictable S-curve flight that teaches shot shaping
Cons
- DX plastic beats in quickly and becomes very flippy
- May be too understable for players with faster arms
- Not ideal for headwind shots
The Leopard has been a staple understable fairway driver since Innova introduced it, and its popularity hasn't faded for good reason. The 6/5/-2/1 flight numbers put it right in the sweet spot for newer arms - enough speed to get meaningful distance without requiring a cannon for an arm. The -2 turn gives you that beautiful right-drifting line on a flat release, and the low fade means it doesn't hook back aggressively at the end. Throw it on a hyzer angle and it flips up flat for one of the straightest, longest flights a beginner can achieve.
In Star plastic, the Leopard holds its flight characteristics longer than DX before beating in. For players building their first bag, this is one of the first discs that belongs on the chart.
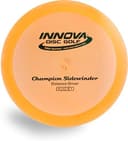
Innova Sidewinder
Innova Champion Sidewinder
Intermediate players who want easy distance and roller lines
Pros
- Excellent glide (5) carries the disc far with moderate power
- Best beginner-friendly distance driver on the market
- Great roller disc as it beats in
- Fills the understable slot at the 9-speed level
Cons
- Too understable for headwinds - will flip and burn
- Players with fast arms may find it too flippy out of the box
- Requires some field work to learn the right release angle
The Sidewinder is the understable distance driver that bridges the gap between fairway drivers and true high-speed discs. At speed 9 with -3 turn and only 1 fade, this disc wants to turn and glide for days. For intermediate players throwing 280-330 feet, the Sidewinder delivers effortless distance because it actually achieves its full flight path at moderate arm speeds.
On a flight chart, the Sidewinder sits firmly on the understable side at the distance driver level. It's the disc you reach for when you need a long sweeping turnover or a roller that carries. Advanced players use it as a dedicated turnover and roller disc, while intermediate players often find it's their longest-flying driver.
Best Neutral/Stable Discs
These discs live in the center of the flight chart. They fly where you point them and finish with a gentle, predictable fade.
Discraft Buzzz

Discraft Z Buzzz
Dead-straight approach shots and the most versatile midrange slot in any bag
Pros
- True point-and-shoot flight path
- Holds any line you put it on - hyzer, flat, or anhyzer
- Z plastic is extremely durable
- Works for every skill level from beginner to pro
Cons
- Not overstable enough to fight wind reliably
- Modest glide compared to some midranges (the Mako3 has more)
- The "right" Buzzz feel takes trying a few plastic types
There's a reason the Buzzz is the best-selling midrange in disc golf. Its 5/4/-1/1 flight numbers produce a remarkably straight line with just enough turn to prevent early fade and just enough fade to give you a predictable finish. On a flight chart, the Buzzz sits almost exactly in the center - the definition of neutral.
What makes the Buzzz special is that it rewards accuracy over power. Throw it at the target and it goes to the target. Shape it on an anhyzer and it holds that line. Shape it on a hyzer and it fades gently. The Z plastic version holds up to abuse and maintains stable flight characteristics for hundreds of rounds.
Innova Mako3
Pros
- The straightest midrange you'll find - 0 turn, 0 fade
- Exceptional glide (5) maximizes distance with minimal effort
- Perfect for learning proper form because it exposes release angle mistakes
- Great for tight, wooded courses
Cons
- Wind will push it off line more than discs with some fade
- 0 fade means no reliable left finish - you need to aim carefully
- DX plastic beats in fast and becomes understable
The Mako3 takes neutrality to the extreme. With flight numbers of 5/5/0/0, this disc has zero turn and zero fade. On a flight chart, it sits at the exact center - the platonic ideal of a straight-flying disc. Throw it flat and it flies flat. There is no hidden curve, no surprise hook at the end.
That 5 glide rating gives the Mako3 impressive carry for a midrange. It floats on air and covers ground without needing much power behind it. The tradeoff is predictability in wind - with no fade or turn to speak of, a crosswind will push the Mako3 off line. But on calm days or in the woods where you need surgical precision through a tight gap, nothing else in the midrange category flies this straight.
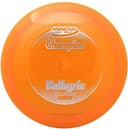
Innova Valkyrie
Innova Champion Valkyrie
First distance driver for intermediate players who want controlled distance with a full flight path
Pros
- Achievable flight path for players who can't max out higher-speed drivers
- Good balance of turn and fade for S-curve distance lines
- Champion plastic is extremely durable
- Works as a straight driver or gentle turnover depending on release
Cons
- DX version beats in quickly and becomes very understable
- Not overstable enough for windy conditions
- Players with 400+ foot arms will overpower it
The Valkyrie occupies a fantastic position on the flight chart - just slightly understable at the 9-speed level. Its -2 turn gives you access to the full flight path without requiring a pro-level arm, while the fade of 2 brings it back at the end with a dependable left finish. For intermediate players, this is often the first distance driver that actually flies like a distance driver should.
On a flight chart, the Valkyrie sits in the upper-center area, leaning slightly toward the understable side. In Champion plastic, it's more overstable out of the box and beats into a perfectly neutral flyer over time. That progression means it occupies slightly different chart positions as it ages, which is a feature, not a bug.
Best Overstable Discs
These discs anchor the left side of the flight chart. They resist turning, fight headwinds, and finish with a hard left hook.
Innova Firebird

Innova Champion Firebird
Headwind drives, flex shots around corners, and utility skip shots
Pros
- The most reliable overstable fairway driver in disc golf
- Exceptional wind fighter with low glide and high fade
- Predictable skip on landing for approach utility
- Holds up in premium plastics for years without losing stability
Cons
- Not a distance disc - low glide limits max distance
- Beginners won't get much use out of it without sufficient arm speed
- Hard fade makes it a poor choice for straight shots
The Firebird is the gold standard of overstable utility drivers. With 0 turn and 4 fade, this disc does not turn right under any circumstances. It launches on whatever angle you give it, holds that line through the high-speed phase, then dumps hard left as it slows down. On a flight chart, the Firebird sits firmly on the far-left side at the 9-speed row.
Every competitive disc golfer carries a Firebird or something similar. It's the disc you throw into a stiff headwind when everything else would flip over. It's the disc you throw on a hyzer around a dogleg left. It's the disc you skip off hardpack for a guaranteed left-sliding approach. Low glide (3) means it doesn't float away from you in the wind, and that fade of 4 means you can always count on the finish.
Discraft Zone
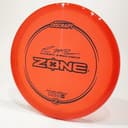
Discraft Z Zone
Overstable approach shots, forehand flicks inside 200 feet, and windy putting
Pros
- Best-in-class overstable approach disc
- Handles forehand torque without turning over
- Low profile sits in the hand comfortably for both forehand and backhand
- Reliable in all wind conditions
Cons
- Limited distance potential due to low glide (3)
- Not a putting putter - the overstability makes it inconsistent inside the circle
- Can feel brick-like if you want any float on your approaches
The Zone is the most popular overstable approach disc in disc golf, and it earns that title every round. At speed 4 with 0 turn and 3 fade, the Zone is a slow, reliable hook machine. On a flight chart, it occupies the lower-left corner - low speed, high overstability. That makes it the complement to your straight-flying putter, covering the shots where you need a guaranteed left finish at approach distance.
Forehand players especially love the Zone because it handles torque without flipping. You can rip a forehand flick at it and it holds the line. In windy conditions, while your other putters and midranges get pushed around, the Zone cuts through and lands where you aimed. The Z plastic version offers the best grip-to-durability ratio for approach duty.
Innova Destroyer

Innova Star Destroyer
Advanced players who need maximum distance with a reliable fade finish
Pros
- Highest distance potential of any mainstream disc
- Excellent glide (5) for a high-speed driver
- Available in every Innova plastic for different stability options
- The standard by which all distance drivers are measured
Cons
- Requires 350+ feet of arm speed to fly as advertised
- Too overstable for beginners and most intermediate players
- Consistency varies between production runs
The Destroyer is the most popular distance driver in disc golf history, and it anchors the upper-left area of any flight chart. At speed 12, you need serious arm speed to unlock its potential - think 350+ feet of power. But when you get there, the 5 glide carries it forever, the -1 turn gives just enough high-speed movement to extend the flight, and the 3 fade brings it back with authority.
Here's the honest truth: most recreational players shouldn't throw a Destroyer. If you can't consistently throw 300 feet with a midrange, this disc will just fade out early and fly like a shorter, less controllable version of the Firebird. But if you have the arm speed, the Destroyer is the distance weapon that belongs on the far end of your flight chart. In Star plastic, it beats in gradually from overstable to dead-straight, eventually becoming the longest disc in your bag.
Why the Same Flight Numbers Fly Differently Across Brands
Here's something most flight chart guides skip: a disc rated 9/5/-1/2 from one manufacturer does not necessarily fly the same as a disc rated 9/5/-1/2 from another. Each brand calibrates their numbers slightly differently, and those differences add up to noticeable on-course behavior.
A few examples of how brands tend to drift:
- Innova is the original flight number system and is generally considered the baseline. Their numbers are a reasonable reference point for everyone else.
- Discraft ratings tend to read about half a point more overstable than Innova at the same numbers. A Discraft disc rated -1 turn often feels more like 0 turn from Innova.
- Latitude 64 / Dynamic Discs / Westside (the Trilogy brands) calibrate close to Innova but vary mold by mold.
- MVP / Axiom discs include overmold technology that shifts the feel of stability beyond what numbers can capture - their gyroscopic effect makes flights more resistant to wobble than the numbers suggest.
- Prodigy ratings tend to read slightly understable compared to Innova at equivalent numbers.
The practical lesson: do not switch brands and assume identical numbers will give you identical flights. If you swap a Buzzz (Discraft 5/4/-1/1) for a Mako3 (Innova 5/5/0/0), you are making a real change even though the numbers look similar. The Mako3 is straighter and more glide-heavy; the Buzzz finishes a touch harder.
This is why community-aggregated charts like the InfiniteDiscs Disc Matrix add real value - they collect player ratings across thousands of throws and normalize the comparison across brands. The manufacturer's number is the starting point. The community-rated number is closer to reality.
If you are building a multi-brand bag, throw a few rounds with each new disc before you trust the chart position. Numbers get you in the ballpark. Field time tells you the truth.
Why Flight Charts Don't Tell the Whole Story
Flight charts are incredibly useful, but they have limits. Here are the factors that can make a disc fly differently than its chart position suggests.
Plastic type matters. Premium plastics (Champion, Z, Opto) fly more overstable than base plastics (DX, Pro-D, Retro). The same mold in two different plastics can occupy noticeably different spots on the flight chart. A DX Leopard is more understable than a Champion Leopard fresh out of the box.
Disc wear changes everything. As discs hit trees, scrape pavement, and grind against chains, they become more understable over time. A brand-new Champion Firebird is a reliable meat hook. A beat-in DX Firebird might fly almost straight. Experienced players intentionally use disc wear to fine-tune their chart positions.
Arm speed is the variable nobody talks about enough. Flight numbers assume a specific throw speed. If your arm is slower than the assumed baseline, every disc in your bag effectively shifts toward the overstable side of the chart. If your arm is faster, everything shifts understable. This is why a beginner's flight chart looks different from a pro's, even when they're throwing the same discs.
Release angle overrides everything. A disc released on hyzer (tilted left for RHBH) will fade more. A disc released on anhyzer (tilted right) will turn more. A Buzzz thrown on anhyzer can look understable. A Leopard thrown on hyzer can look overstable. The chart assumes a flat release - your actual throw might not be flat.
Weight affects stability. Lighter discs (150-160g) fly more understable than max-weight discs (173-175g) of the same mold. If you want to nudge a disc's chart position toward the understable side without changing molds, drop 10-15 grams.
Manufacturer ratings aren't standardized. An Innova disc rated 9/5/-1/2 and a Discraft disc rated 9/5/-1/2 might not fly identically. Each company calibrates their numbers slightly differently. This is another reason to use community-driven flight charts like those on InfiniteDiscs, which aggregate real-world player feedback rather than relying solely on manufacturer ratings.
Where to Find Disc Golf Flight Charts Online
Here are the best tools for exploring flight charts and comparing discs:
Marshall Street Flight Guide (marshallstreetdiscgolf.com/flightguide) - The gold standard. This interactive chart plots discs from every manufacturer on a single grid organized by speed and stability. You can filter by brand, disc type, and speed range. Hover over any disc to see its flight numbers and a brief description. Over 75% of users rate it "Very Helpful" or "Extremely Helpful" in surveys. If you bookmark one flight chart resource, make it this one.
InfiniteDiscs Disc Matrix (infinitediscs.com/Disc-Matrix) - InfiniteDiscs takes a different approach. Instead of relying only on manufacturer-assigned flight numbers, they aggregate flight ratings from actual player reviews. This means their chart reflects how discs really fly in the hands of real people, not just how the manufacturer designed them to fly. They also provide flight ratings adjusted for different arm speeds, which is a fantastic feature for beginners.
Innova Disc Comparison Tool (innovadiscs.com/disc-golf-discs/disc-comparison) - If you're primarily an Innova thrower, this tool lets you sort their entire lineup by any flight number. It's not a visual chart, but it's the definitive database for Innova flight ratings.
DG Puttheads Flight Charts (flightcharts.dgputtheads.com) - Offers individual flight path visualizations for popular discs. If you want to see the actual drawn flight path of a specific disc, this is the best resource.
UDisc Blog (udisc.com/blog) - While not a chart tool, UDisc's educational content about flight numbers and disc selection is excellent and frequently updated. Their articles on what flight numbers mean are worth reading alongside any chart tool you use.
Frequently Asked Questions
How do I read a disc golf flight chart?
Find your disc on the chart by name. The vertical position shows speed (putters at the bottom, distance drivers at the top). The horizontal position shows stability (overstable on the left, understable on the right). If the chart draws a flight path, follow the curve from release to landing - that is what the disc will do for a right-hand backhand thrower with adequate arm speed and a flat release.
Are flight numbers consistent across brands?
No. Each manufacturer calibrates their numbers slightly differently. A disc rated -1 turn from Discraft often feels closer to 0 turn from Innova. Trilogy brands (Latitude 64, Dynamic Discs, Westside) generally calibrate close to Innova. MVP and Axiom add gyroscopic effects that the numbers cannot capture. Treat the numbers as a starting point, not a guarantee.
What is the most important flight number?
For most players, fade is the most decisive number on the chart because it determines how reliably your disc finishes. Turn matters more for max distance and shot shaping. Speed dictates whether you can throw the disc at all - if it is too high for your arm, the rest of the numbers are irrelevant. Glide is the underrated wildcard that turns a mid-distance disc into a long one.
Do flight charts work for forehand throws?
Partially. Flight charts assume a backhand release because backhand is more common, and forehand spin imparts different physics. A disc that flies neutral on a backhand often flies slightly more understable on a forehand because of the wobble forehand spin creates. The fix is to read the chart, then pick a disc one stability level more overstable than the chart suggests for your forehand version of the same shot. See our overstable vs understable guide for more on the forehand stability adjustment.
How does plastic type change a disc's flight chart position?
Premium plastics (Champion, Z, Star, Opto) fly more overstable than base plastics (DX, Pro-D, Retro, Baseline) of the same mold. Over time, base plastics beat in faster and shift toward the understable side of the chart. A new Champion Firebird and a beat-in DX Firebird are technically the same mold but occupy noticeably different chart positions. If you want stability that holds, buy premium. If you want a disc to break in fast, go base.
What is the best disc golf flight chart?
There is no single best chart - they all use the same underlying flight number system. Marshall Street's Flight Guide is the most popular interactive overhead chart and lets you filter across every major brand. The InfiniteDiscs Disc Matrix is the best for community-rated numbers (closer to how discs actually fly). DG Puttheads visualizes individual flight paths. Use whichever interface works for you - the data is largely the same.
Why is the chart different from how my disc actually flies?
Three big reasons. First, your arm speed differs from the baseline the chart assumes - slower arms make every disc act more overstable, faster arms make everything more understable. Second, your release angle changes the flight (hyzer adds fade, anhyzer adds turn). Third, wind shifts effective stability - headwinds make discs act understable, tailwinds make them act overstable. The chart is a model. Real-world flight is the chart plus your form plus the conditions.
Final Thoughts
A disc golf flight chart is your cheat sheet for building a smarter bag. Instead of guessing whether a disc will turn, fade, or fly straight, you can see it plotted visually against every other disc on the market. That's powerful information whether you're a beginner picking your first three discs or an advanced player fine-tuning your 20-disc tournament bag.
Start with the Marshall Street Flight Guide or InfiniteDiscs Disc Matrix. Find where your current discs sit on the chart. Look for gaps - do you have an understable fairway driver? An overstable approach disc? A neutral midrange? If any of those slots are empty, the disc recommendations in this guide are a great starting point.
Remember that the chart is a starting point, not gospel. Your arm speed, release angle, and the wear on your discs all shift where things actually land on the flight path. But the chart gives you a framework for making smart decisions instead of impulse buys. Use it, trust it, and adjust as you learn what works for your game.
If you're still wrapping your head around what those four numbers mean, check out our deep dive on disc golf flight numbers explained. And if you're building your first bag from scratch, our guide to the best disc golf discs for beginners will point you to the right starting lineup. To go deeper on what stability actually means, read our overstable vs understable guide.
Affiliate Disclosure
This post contains affiliate links. As an Amazon Associate, Pine Tree Disc earns from qualifying purchases at no additional cost to you. Learn more